


Introduction to User Roles
Customizing user roles allows incubators and accelerators to delegate responsibilities securely by granting precise platform permissions and interface navigation settings to different team members. AcceleratorApp provides predefined roles with standard permissions, which you can duplicate and modify to build custom roles.
This feature helps streamline administrative workflows, protect sensitive data, and maintain clear boundaries across your community.
Note on Pricing Plans: Creating custom roles based on admin, admin coach, coach, staff, or sub-admin templates may affect your billing plan tier. [KALED: please verify if specific user limit thresholds trigger billing updates]
Where to Manage and Customize User Roles
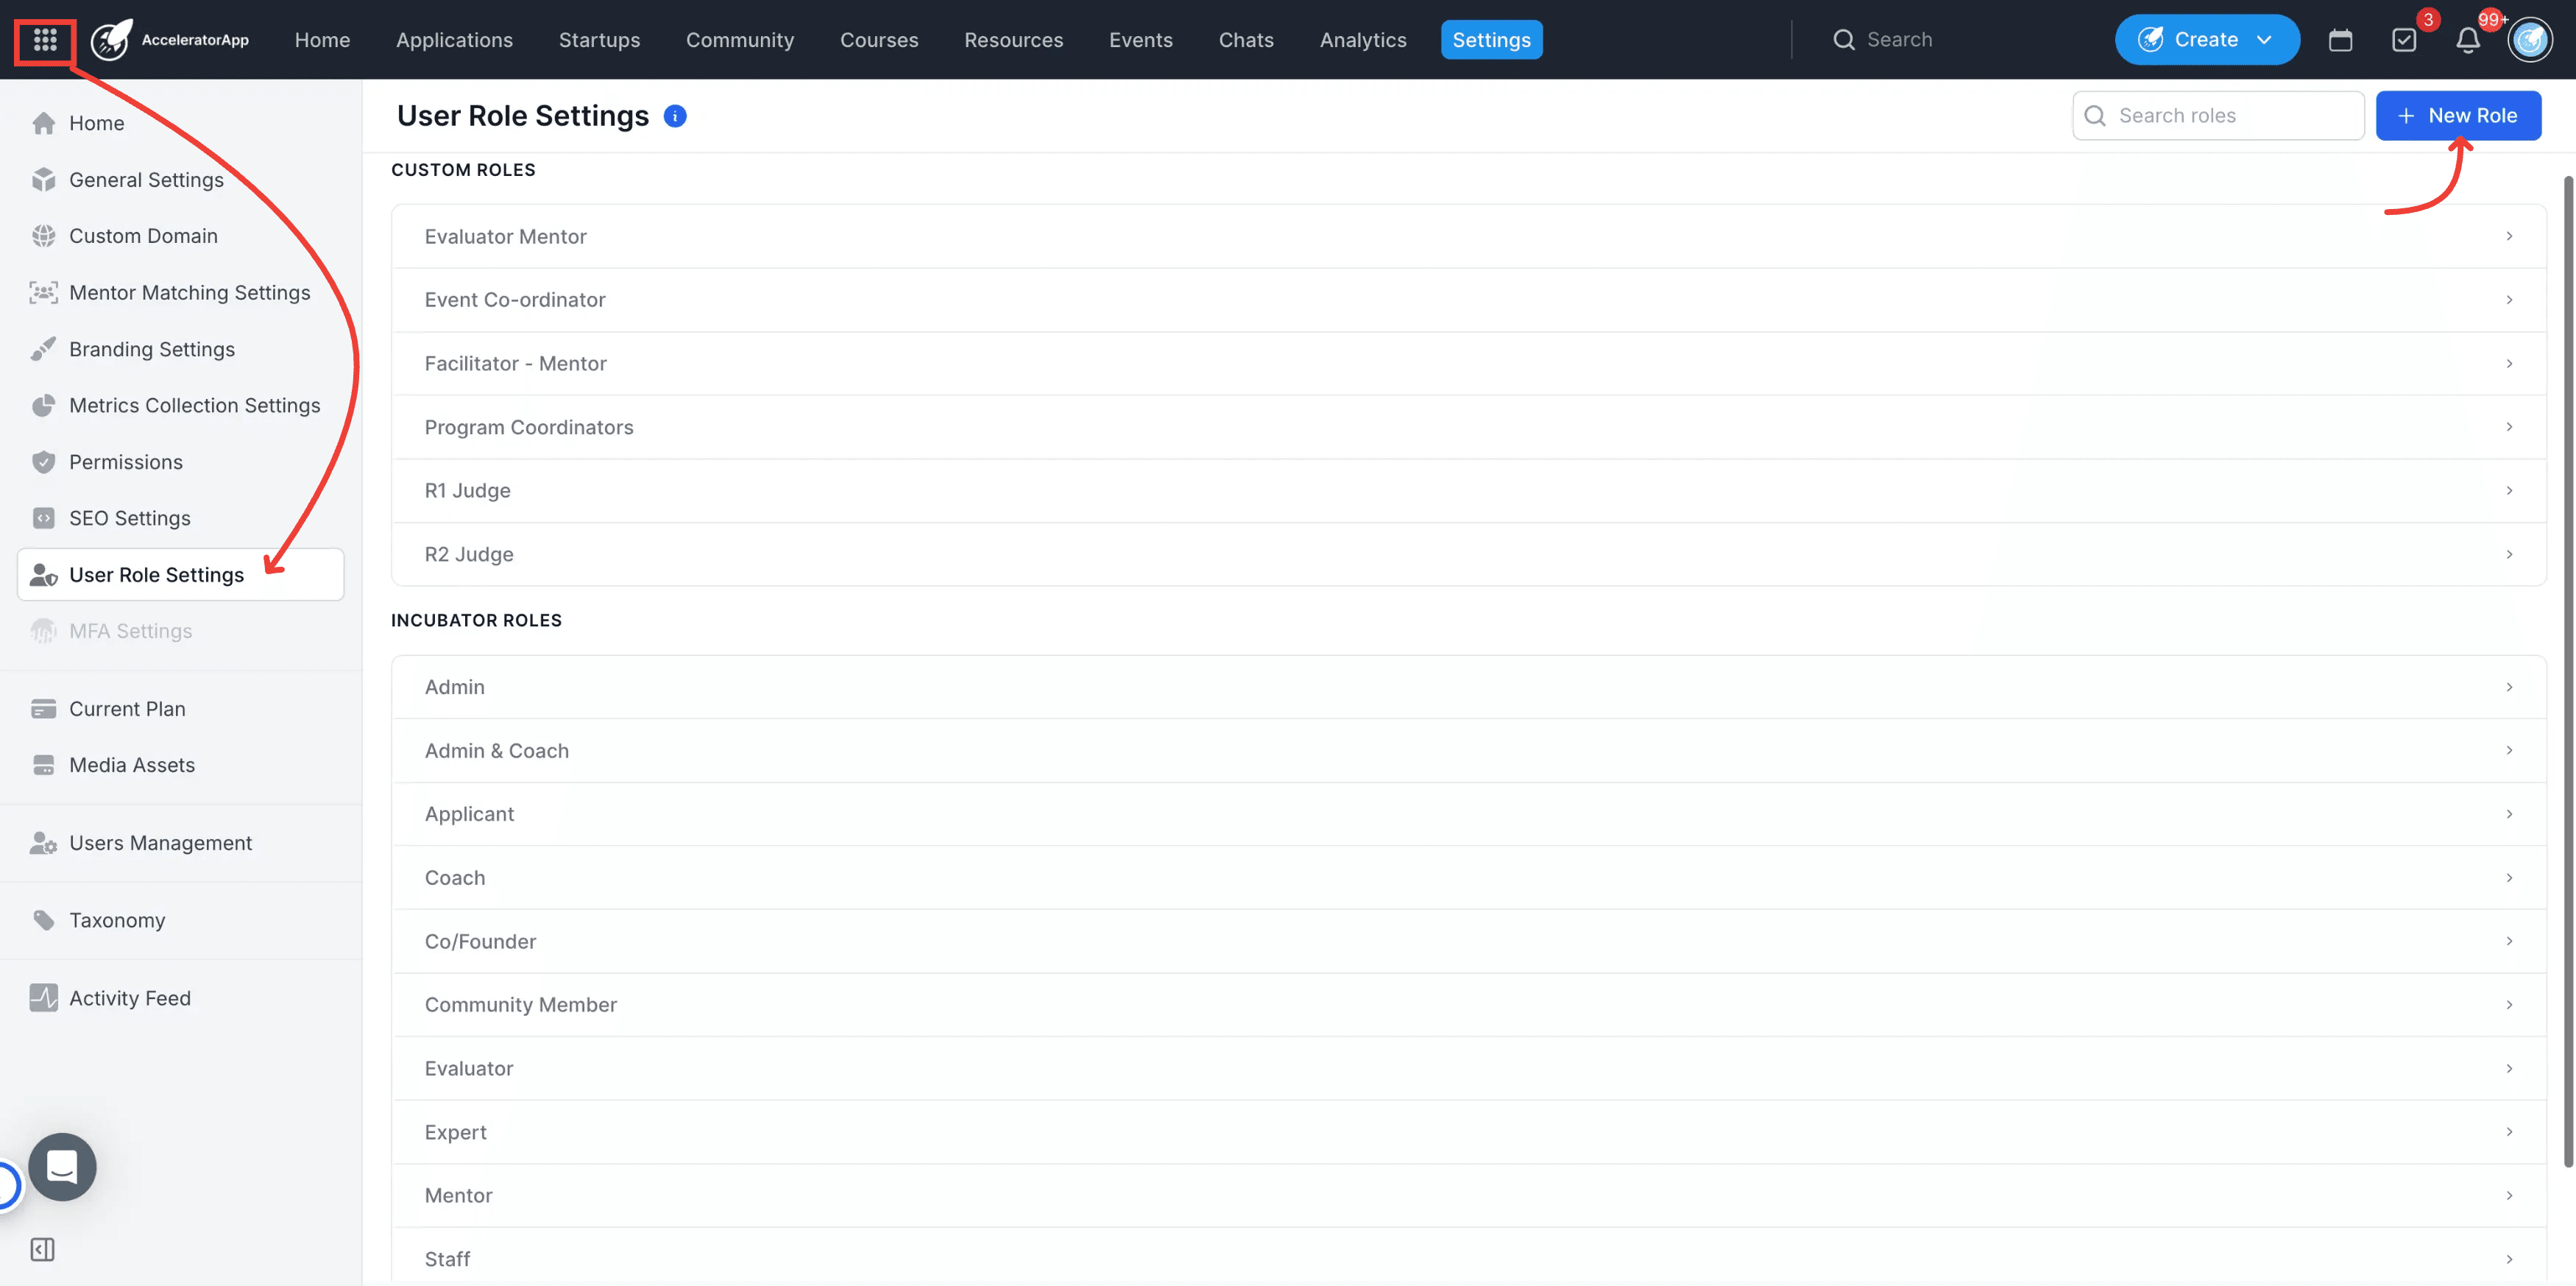
Click on the Menu icon on the top left of the page, click on General Settings, and click on User Role Settings.

1. Access General Settings
Click on the Menu icon in the top left corner of the interface and select General Settings.
2. Open User Role Settings
Select User Role Settings from the left navigation panel or the General Settings dashboard.
3. Create a new role
Click the New Role button in the top right corner of the page.
4. Fill in role details
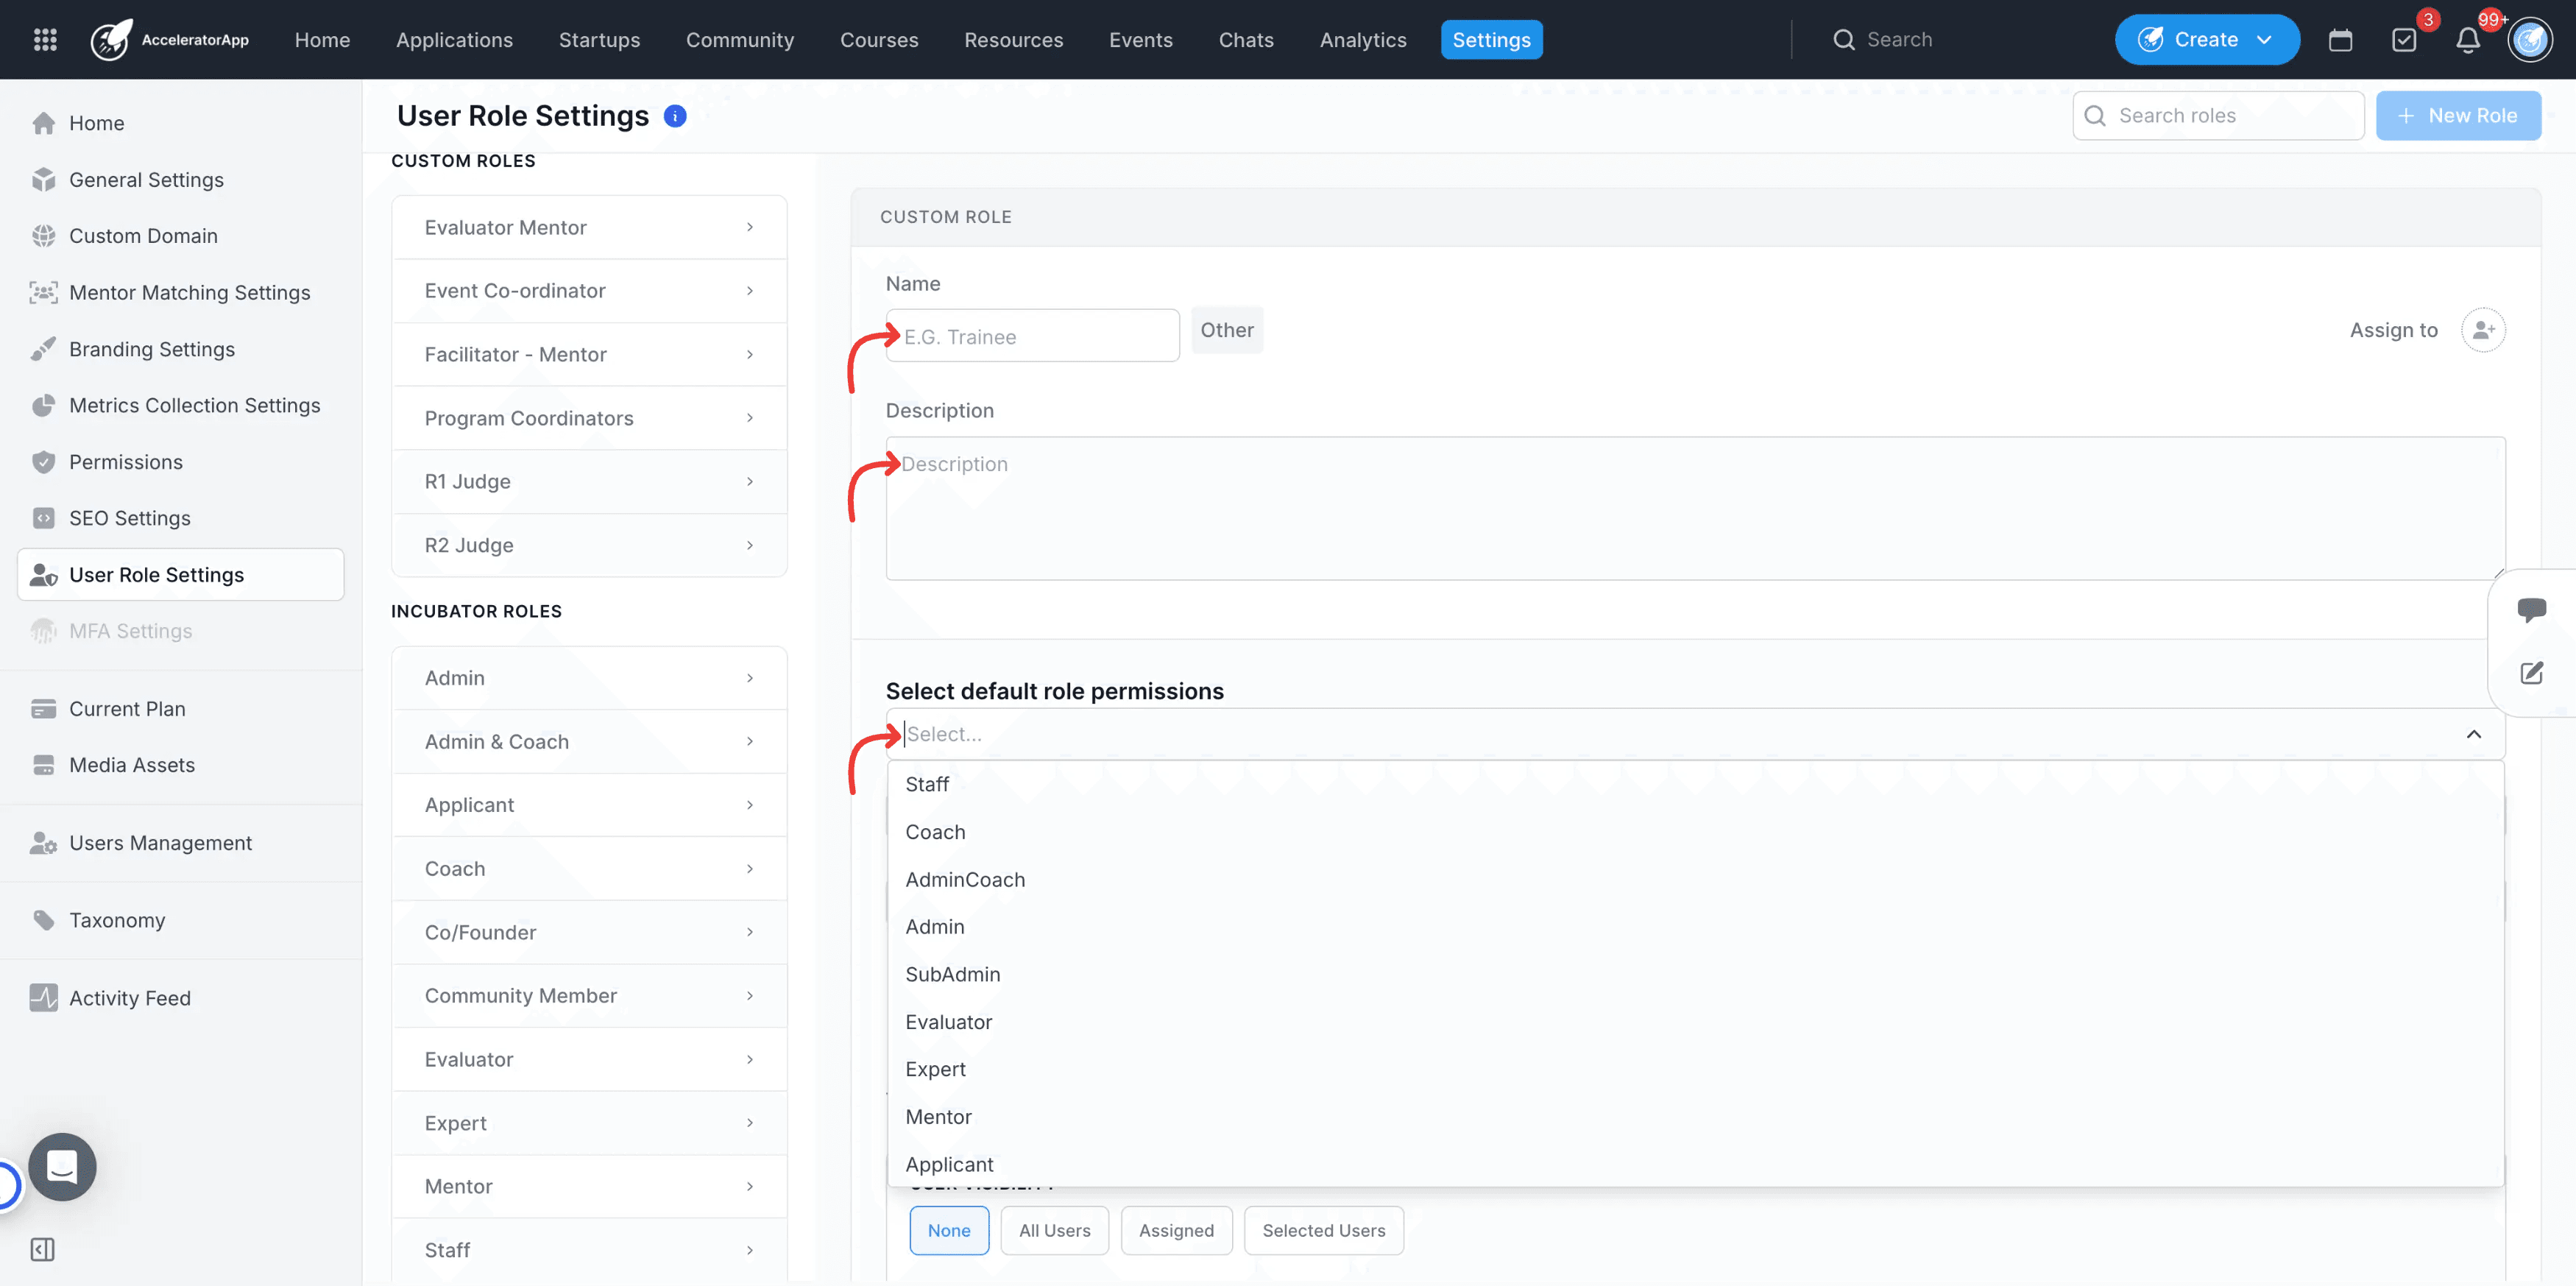
Enter a Role Name, provide a clear Description, and choose a base Incubator Role Template to pre-populate default permissions.
5. Configure permissions
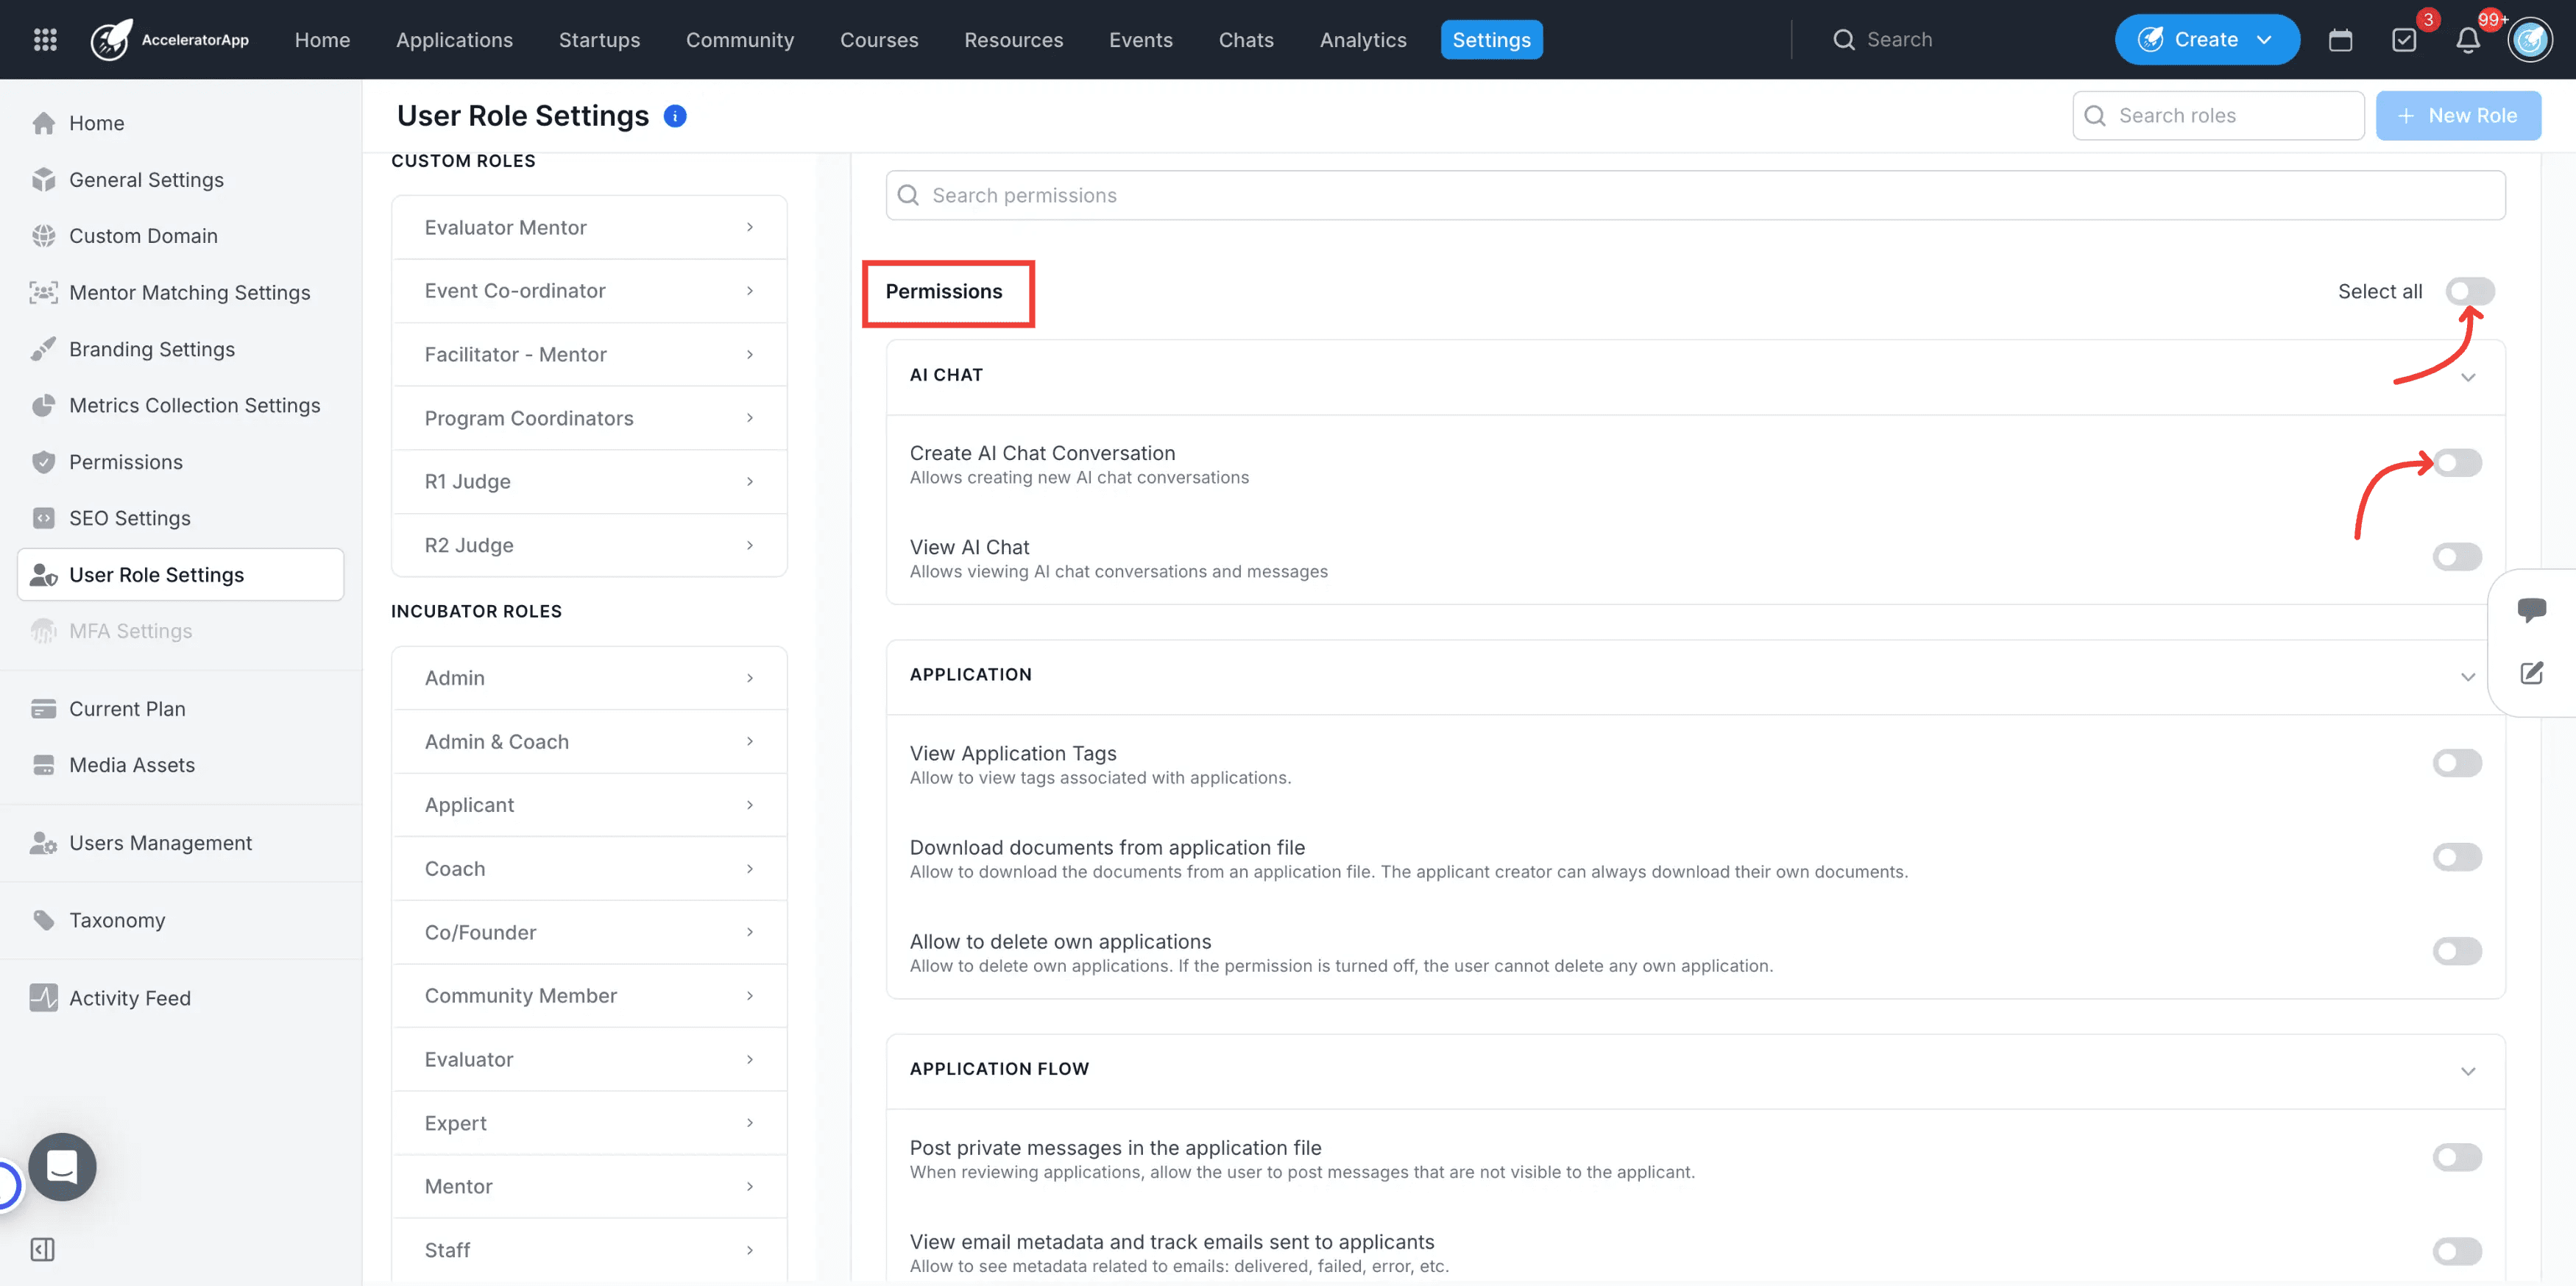
Toggle permissions on (blue) or off (grey) across the permission categories to define what actions this role can perform.
7. Set profile visibility
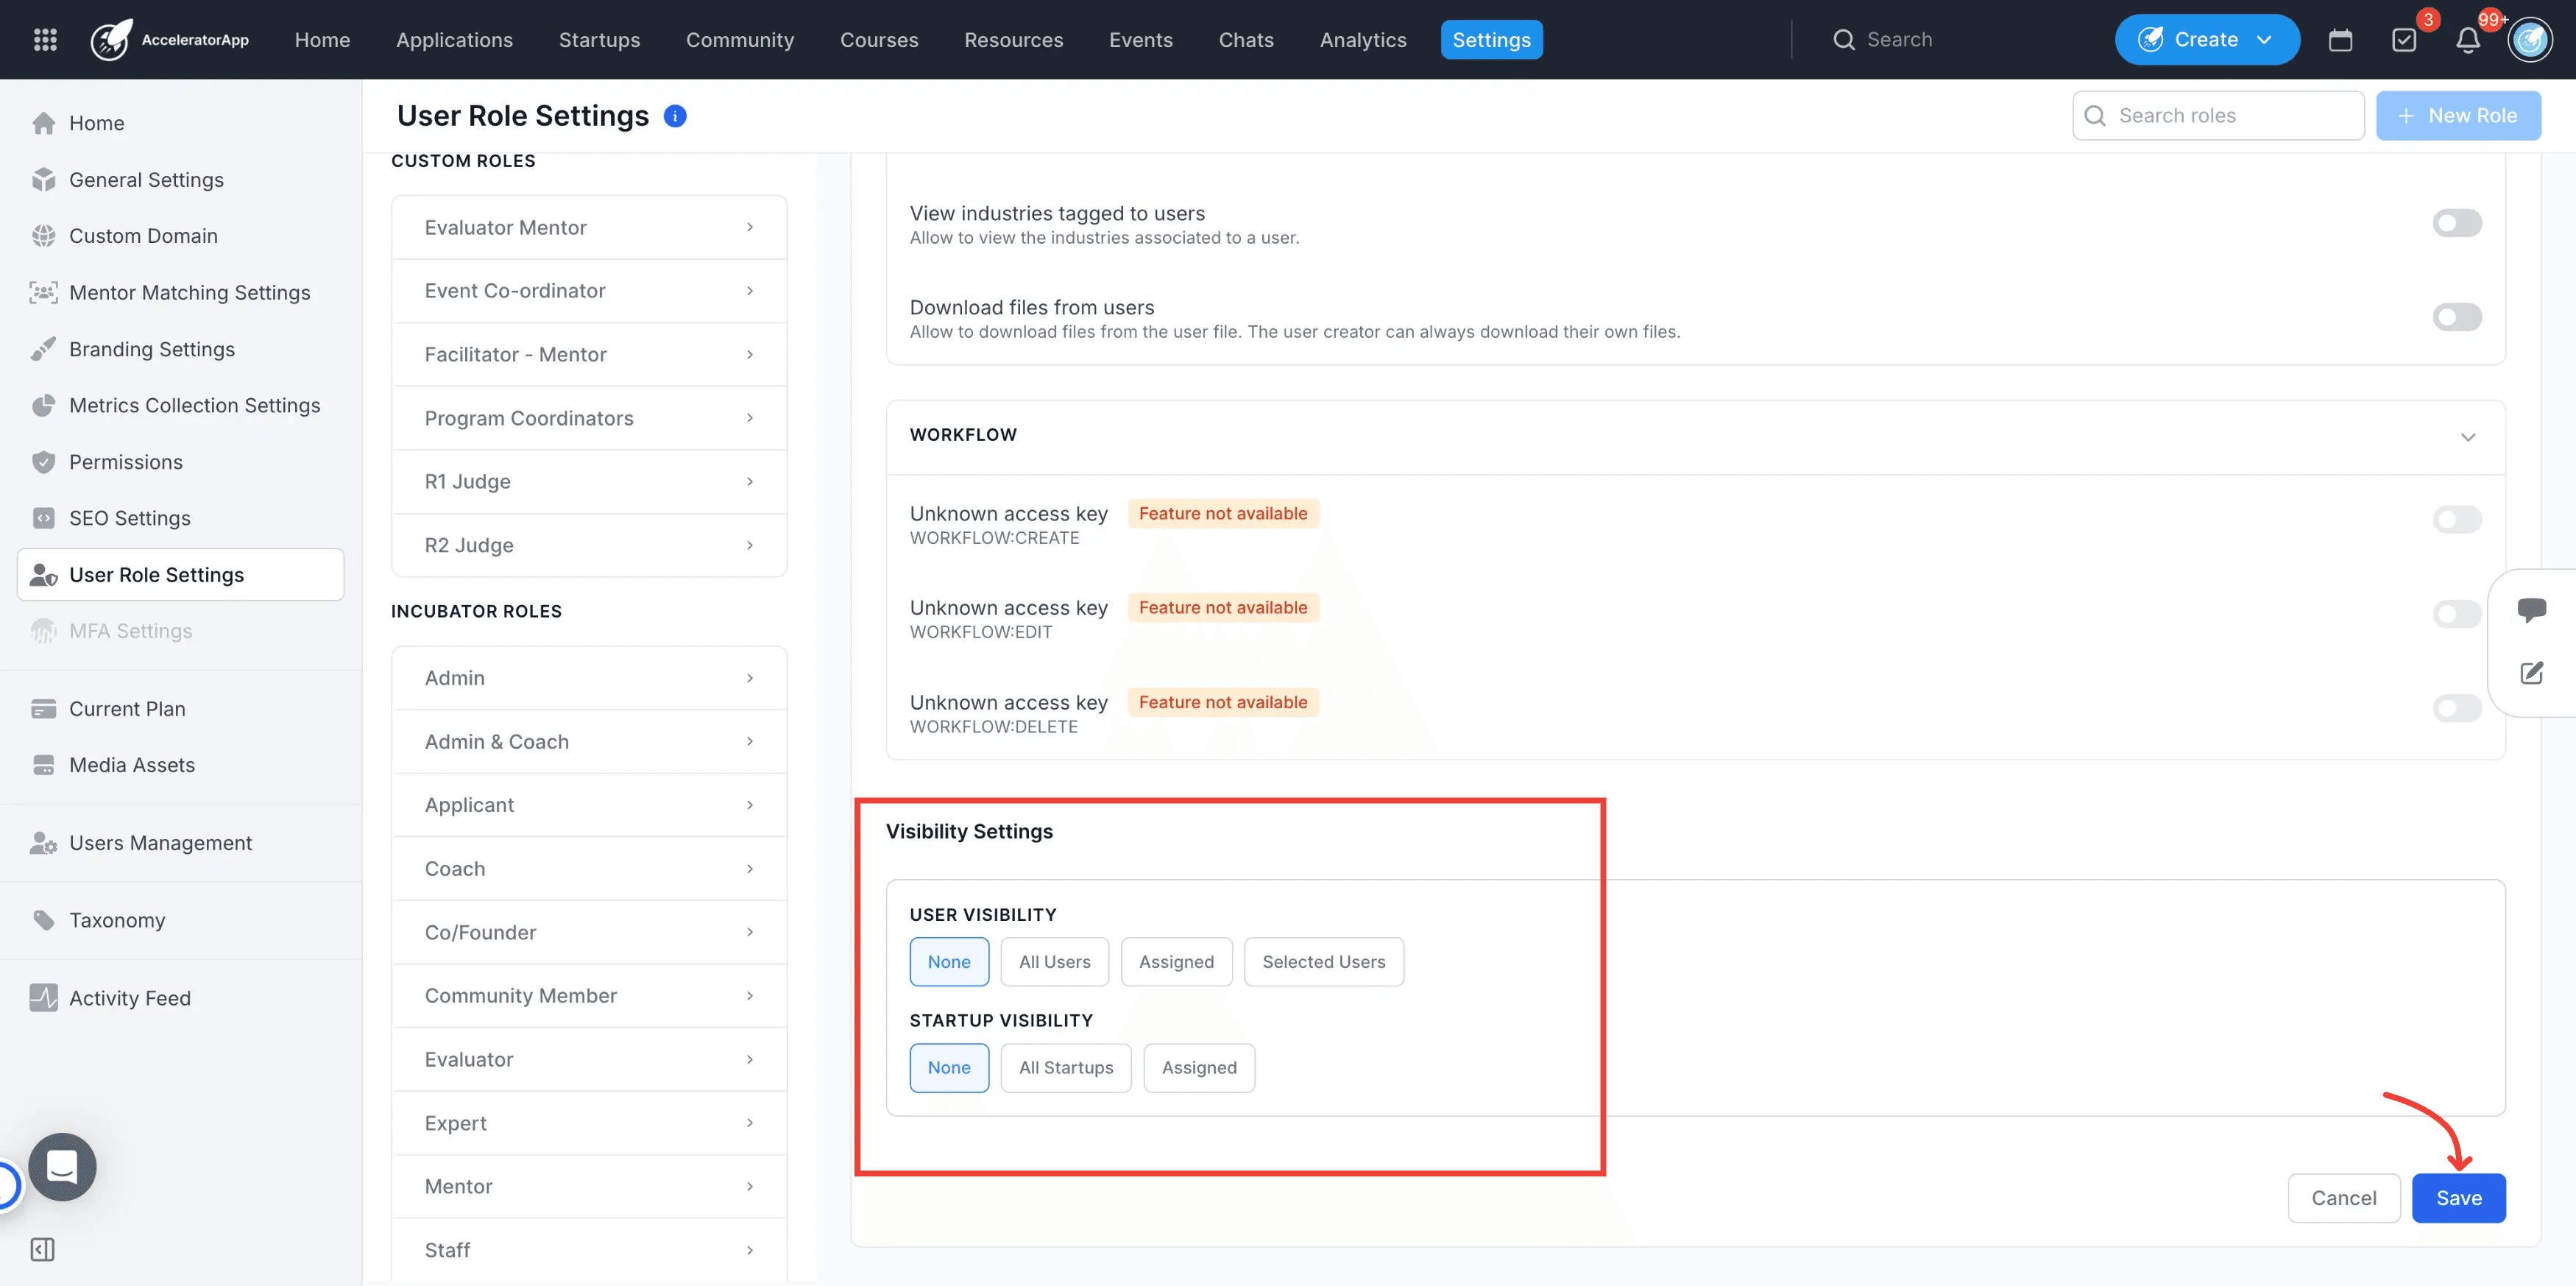
Navigate to the Profile Visibility Settings section within the role editor to choose which community roles can view users assigned to this custom role.
8. Save the custom role
Click Save to create the new customized role and add it to your role directory.
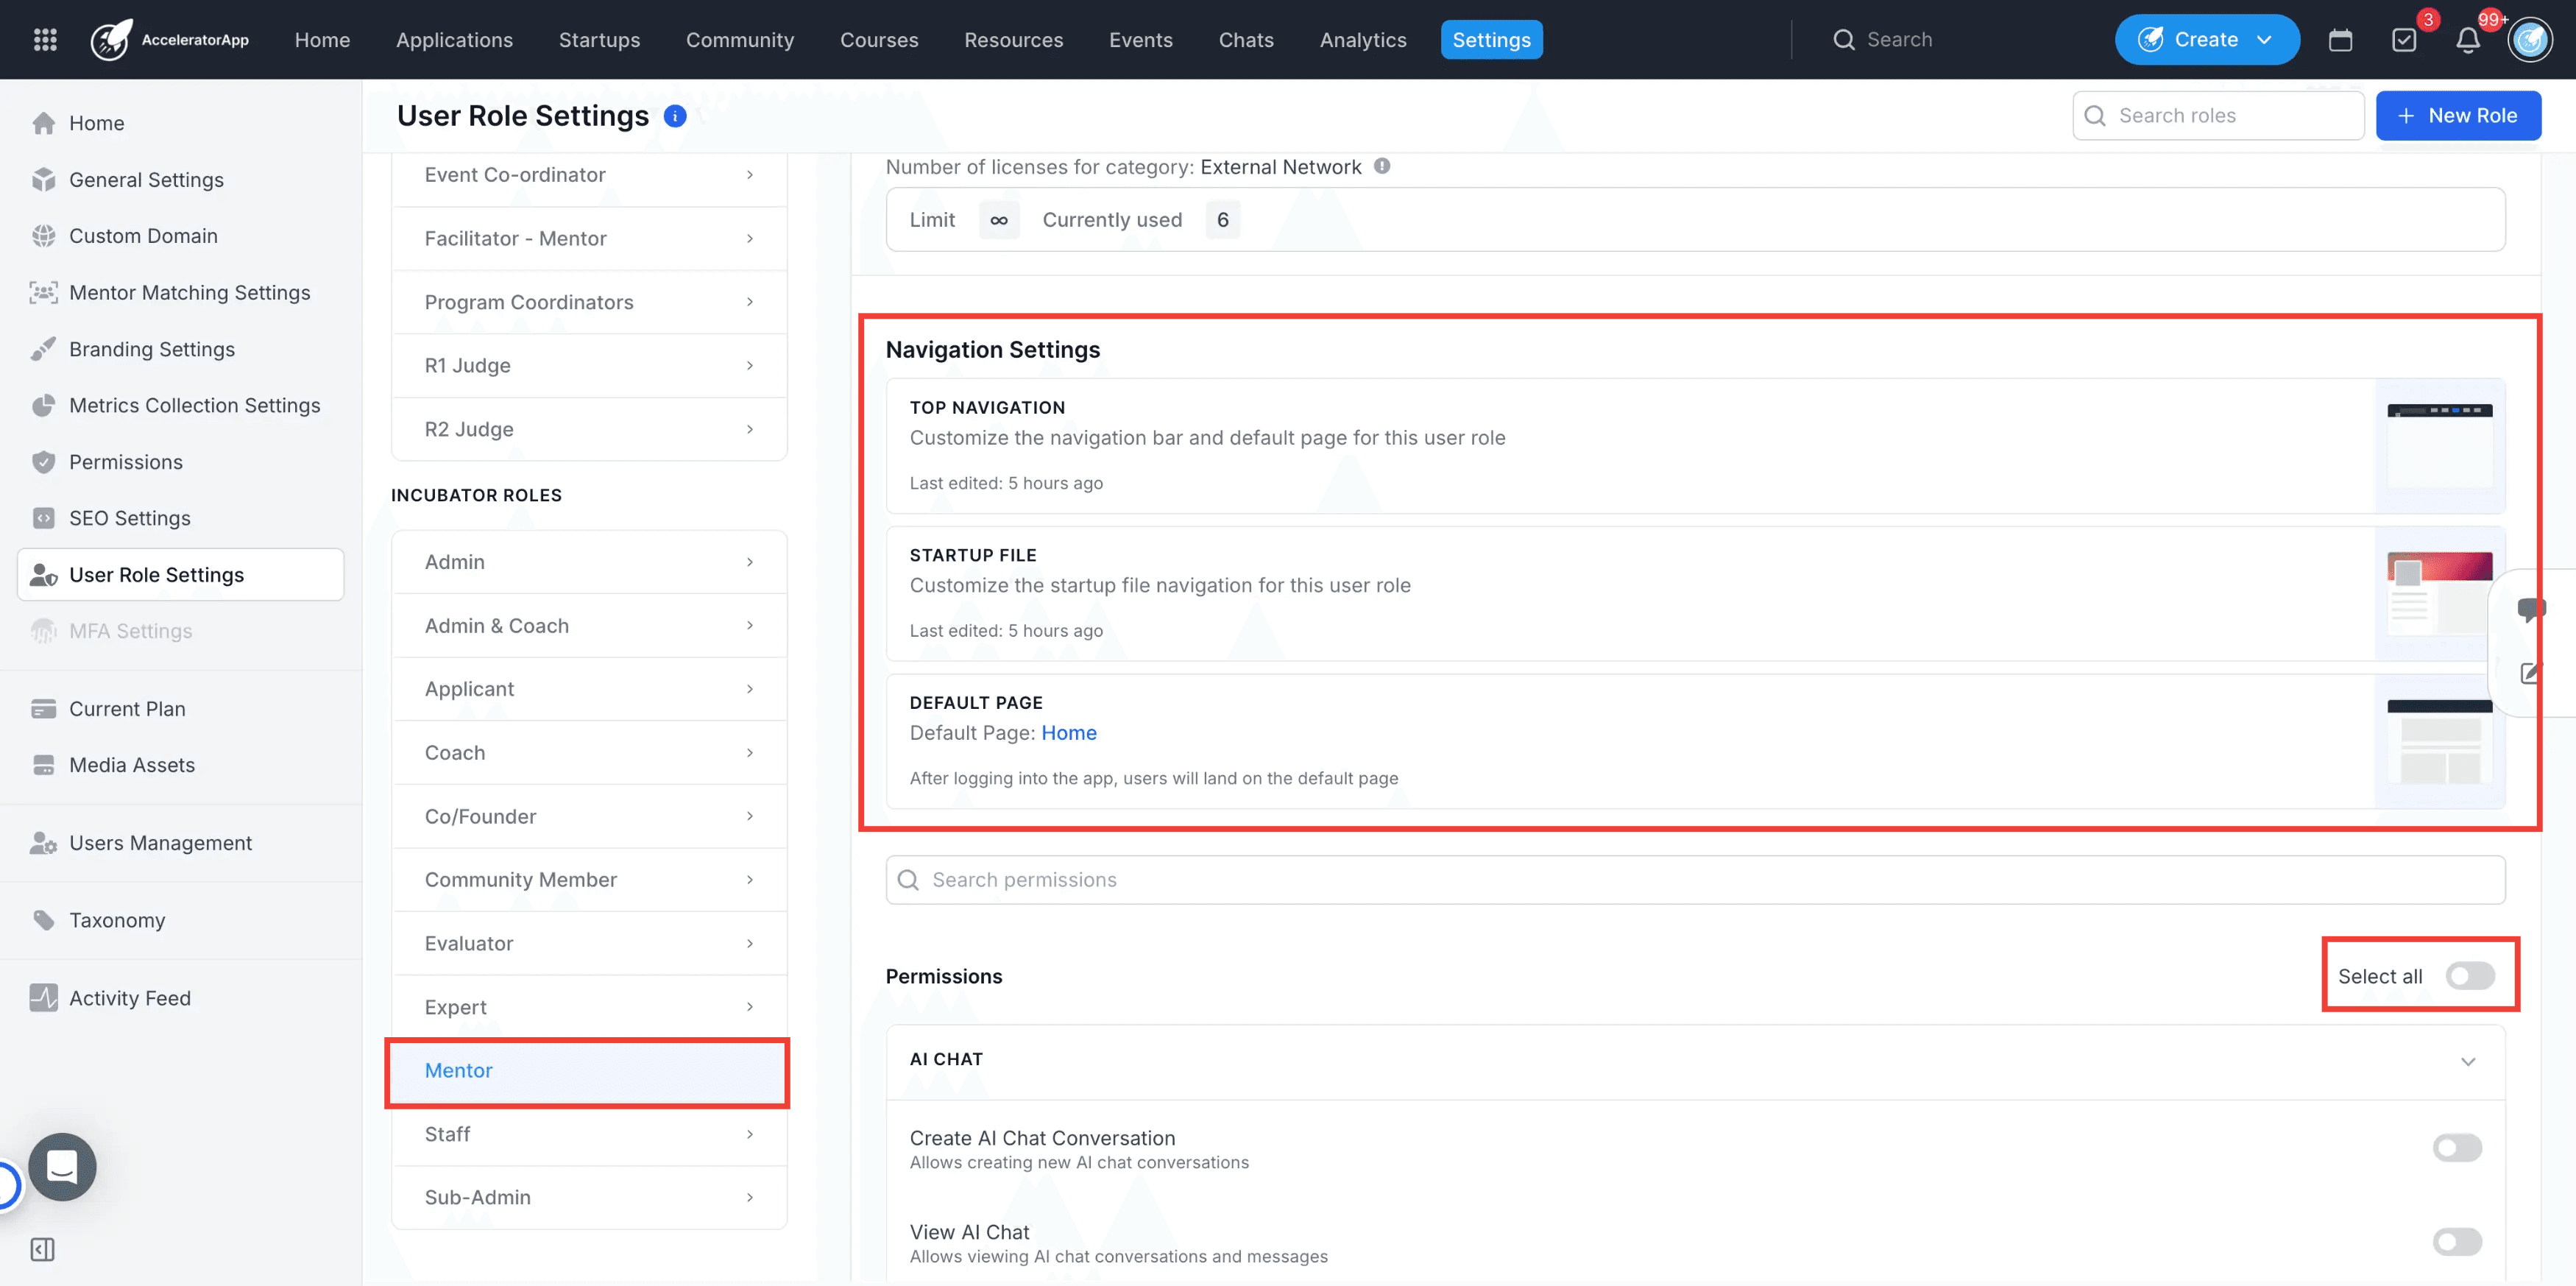
9. Configure Navigation Settings
Set up the user interface layout and defaults for this role after its creation:
- Top Navigation Bar: Define how the top navigation bar will look, including visible modules and access order.
- Startup File Tab Access: Set the specific access levels and tabs this user role can see when navigating to a startup file.
- Default Landing Page: Choose the specific page users with this role will automatically see upon logging in.
10. Customize default roles
To adjust an existing system default role instead of creating a new one, hover over the predefined role in the list and click Edit Permissions.
Best Practices
- Use the search bar inside the permission settings page to find specific permissions quickly without scrolling through full categories.
- Collapse permission categories you are not actively editing to keep the configuration view organized.
- Set a relevant default landing page for each role (e.g., Dashboard for Admins, Applications for Evaluators) to speed up user workflows.
- Review existing predefined templates thoroughly before creating a new custom role to avoid redundant permission sets.
- Double-check profile visibility settings when creating administrative roles to ensure internal roles remain hidden from public or applicant views.